Create and Labels in TradeSchool for Avery 5160 or 5163.
Create Labels
To start, click on the Module where you want to print labels. Next, click on Correspondence > Labels > Details tab.
Here, you can create label templates. The only sizes available are Avery 5160 and Avery 5263, which are designed for stick-on mailing labels or stick-on ID Badges.
You can print and create labels from the Application, Apprentices, and Contractors Modules.
If you need to create merge labels other than these sizes reach out to support@tradeschoolinc.com
On the right, you may see a list of existing label templates.
- Click the + icon to create a new label.
- Enter the label name; your new label will now exist on the right.
- In the center is editable information for the currently selected label.
- To add merge fields, click on the merge fields tab and place the cursor in the content field.
- On the right 🔍 search to find the merge field you are looking for.
- Click on the merge field and it will appear where your cursor was in the content field.
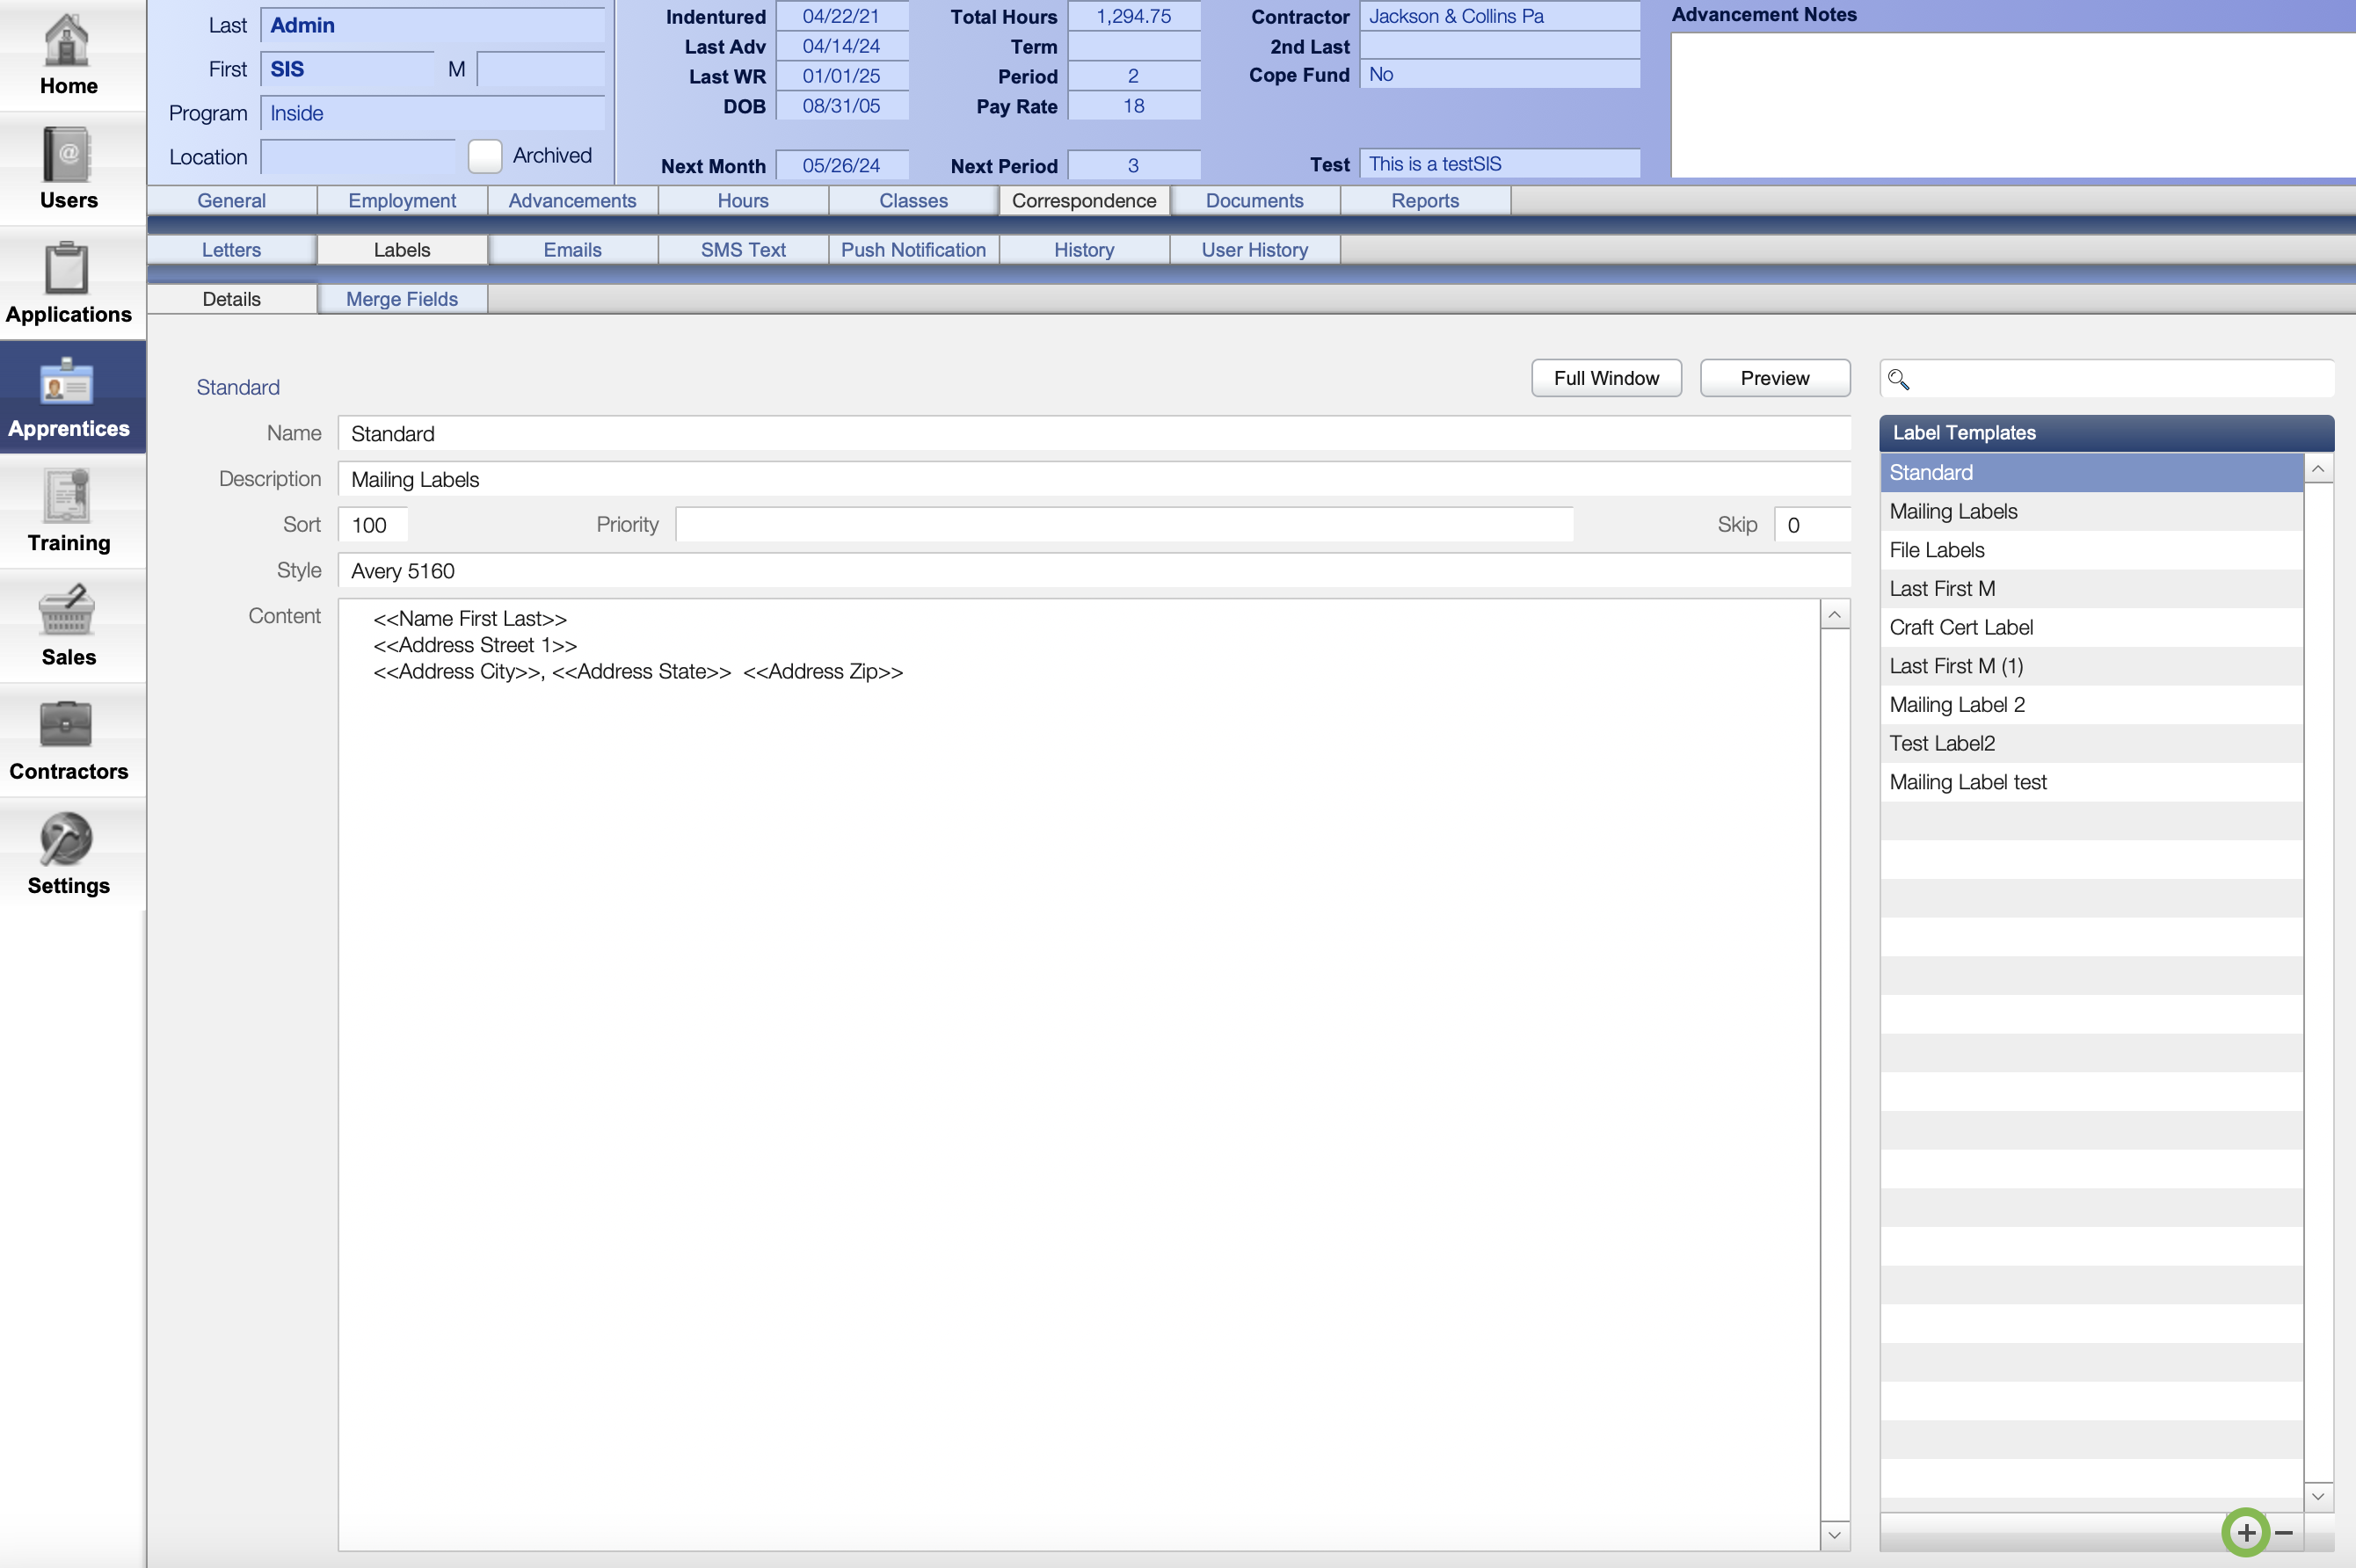
Fields:
- The Name field is already set.
- The Description Field is optional and can contain notes about the purpose of the label.
- The Sort number is 100 by default. Making the number smaller or larger will change the label's position on the list on the right.
- The Skip number allows you to skip down the sheets so that your label starts further down the page. This is convenient if you are printing on a sheet where some of the labels have already been used.
- The Style selects from available Avery label sizes.
- The Content contains your formatted text and merge field if desired.
Full Window, Preivew & Print
Click on the Full Window Button to edit in a larger area and use the word processing and text formatting options. If you close out of this window, the template is automatically saved.
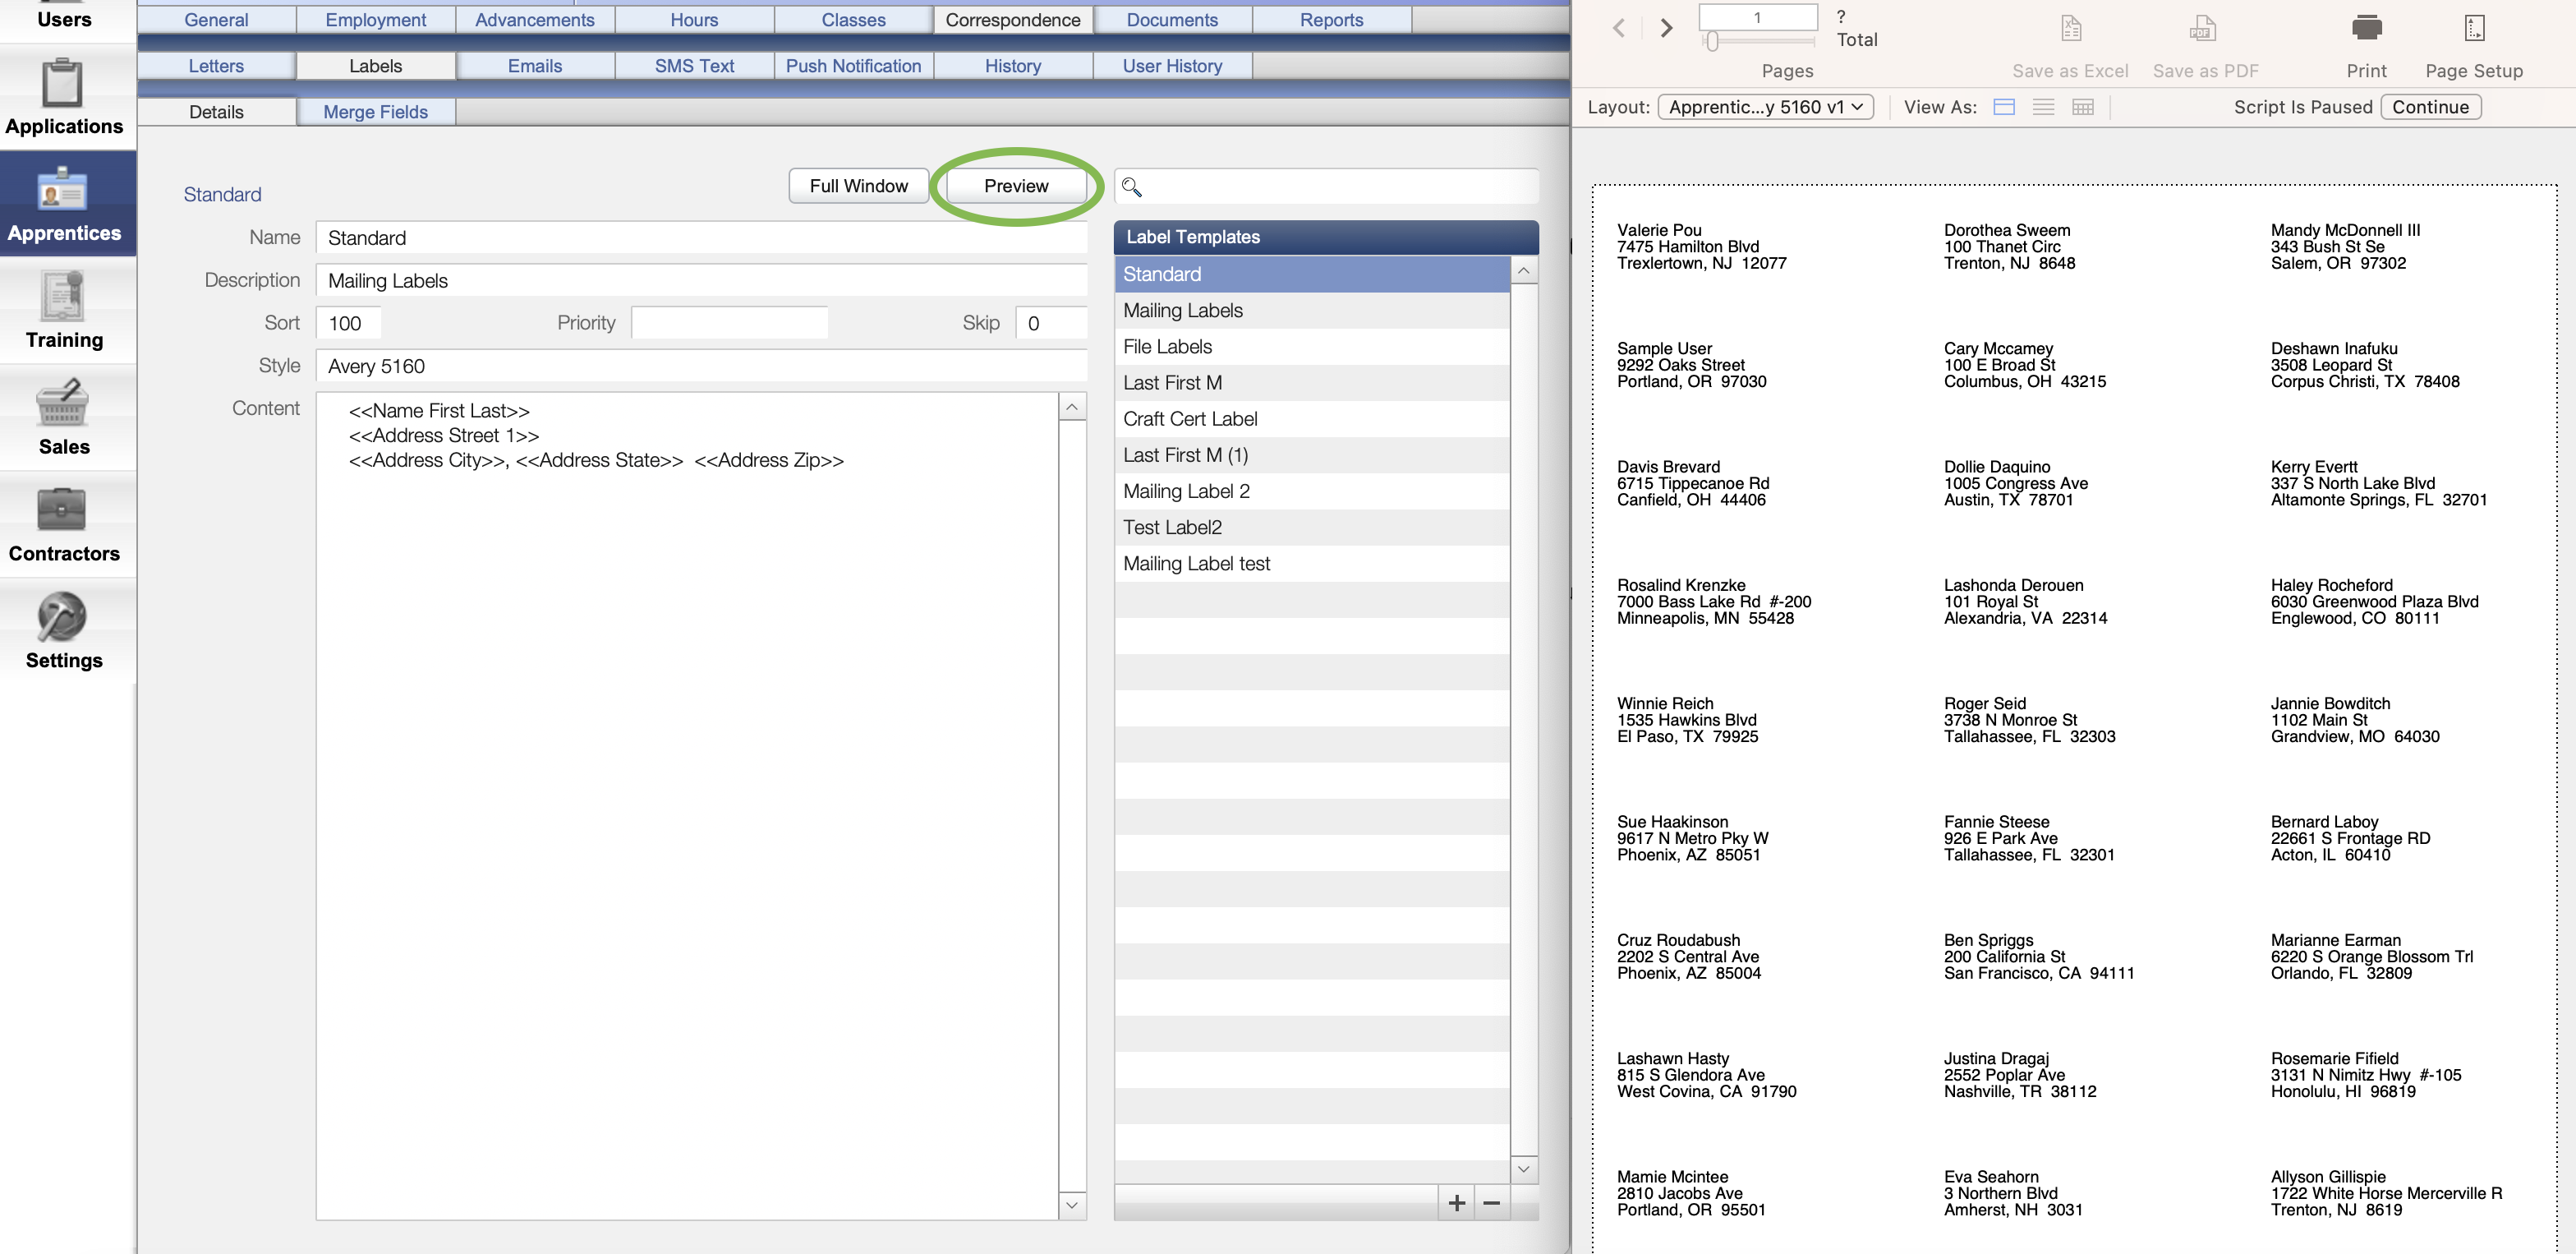
Click the Preview Button to show labels for the existing found set. The Merge fields will be replaced with live data.
Preview all your labels, and if you need to make adjustments, close the preview window by clicking continue and edit your labels in the content field.
Click Preview again, and once you are happy with your labels, Print.