
Send and Receive Signed Documents with the Forms Feature.
Creating Forms in Settings
Build, request, and manage online forms for apprentices—all from within the Apprentice Module.
To create a new form, go to Settings Module > Web Services > General > Forms tab. There, you’ll see the interface for creating and managing forms.
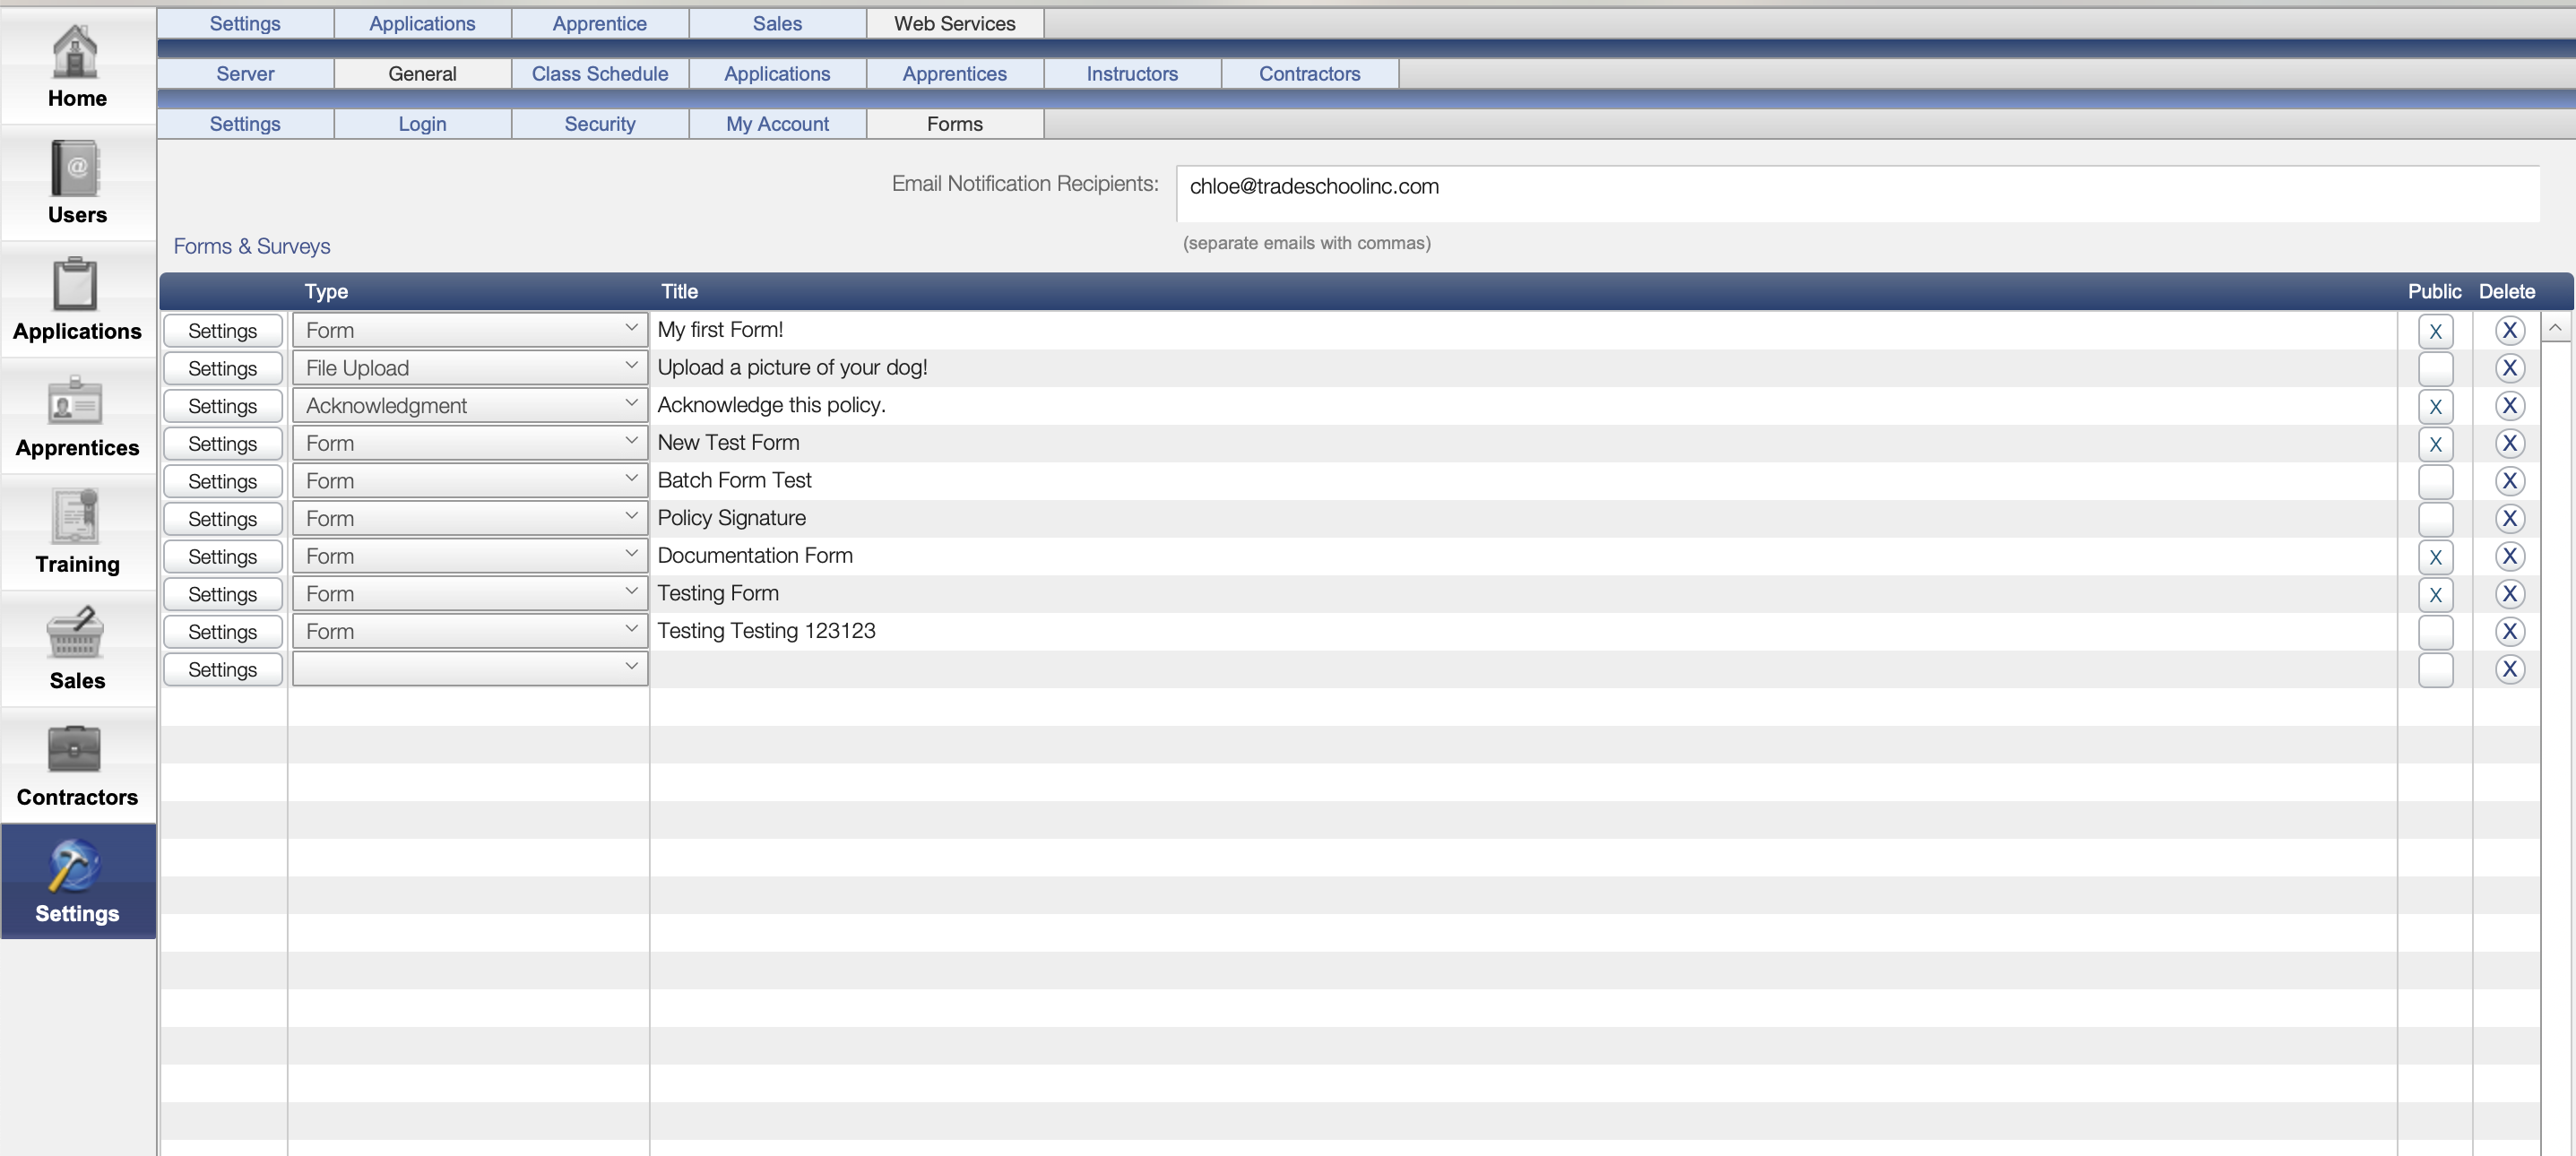
Choose a Form Type
When creating a new form, choose from one of the following types:
Form – A standard fillable form.
File Upload – Upload documents (e.g., photos, PDFs).
Acknowledgement – Used for one-click acknowledgment confirmations.
For more guidance on forms elements and structure please refer to the article below.
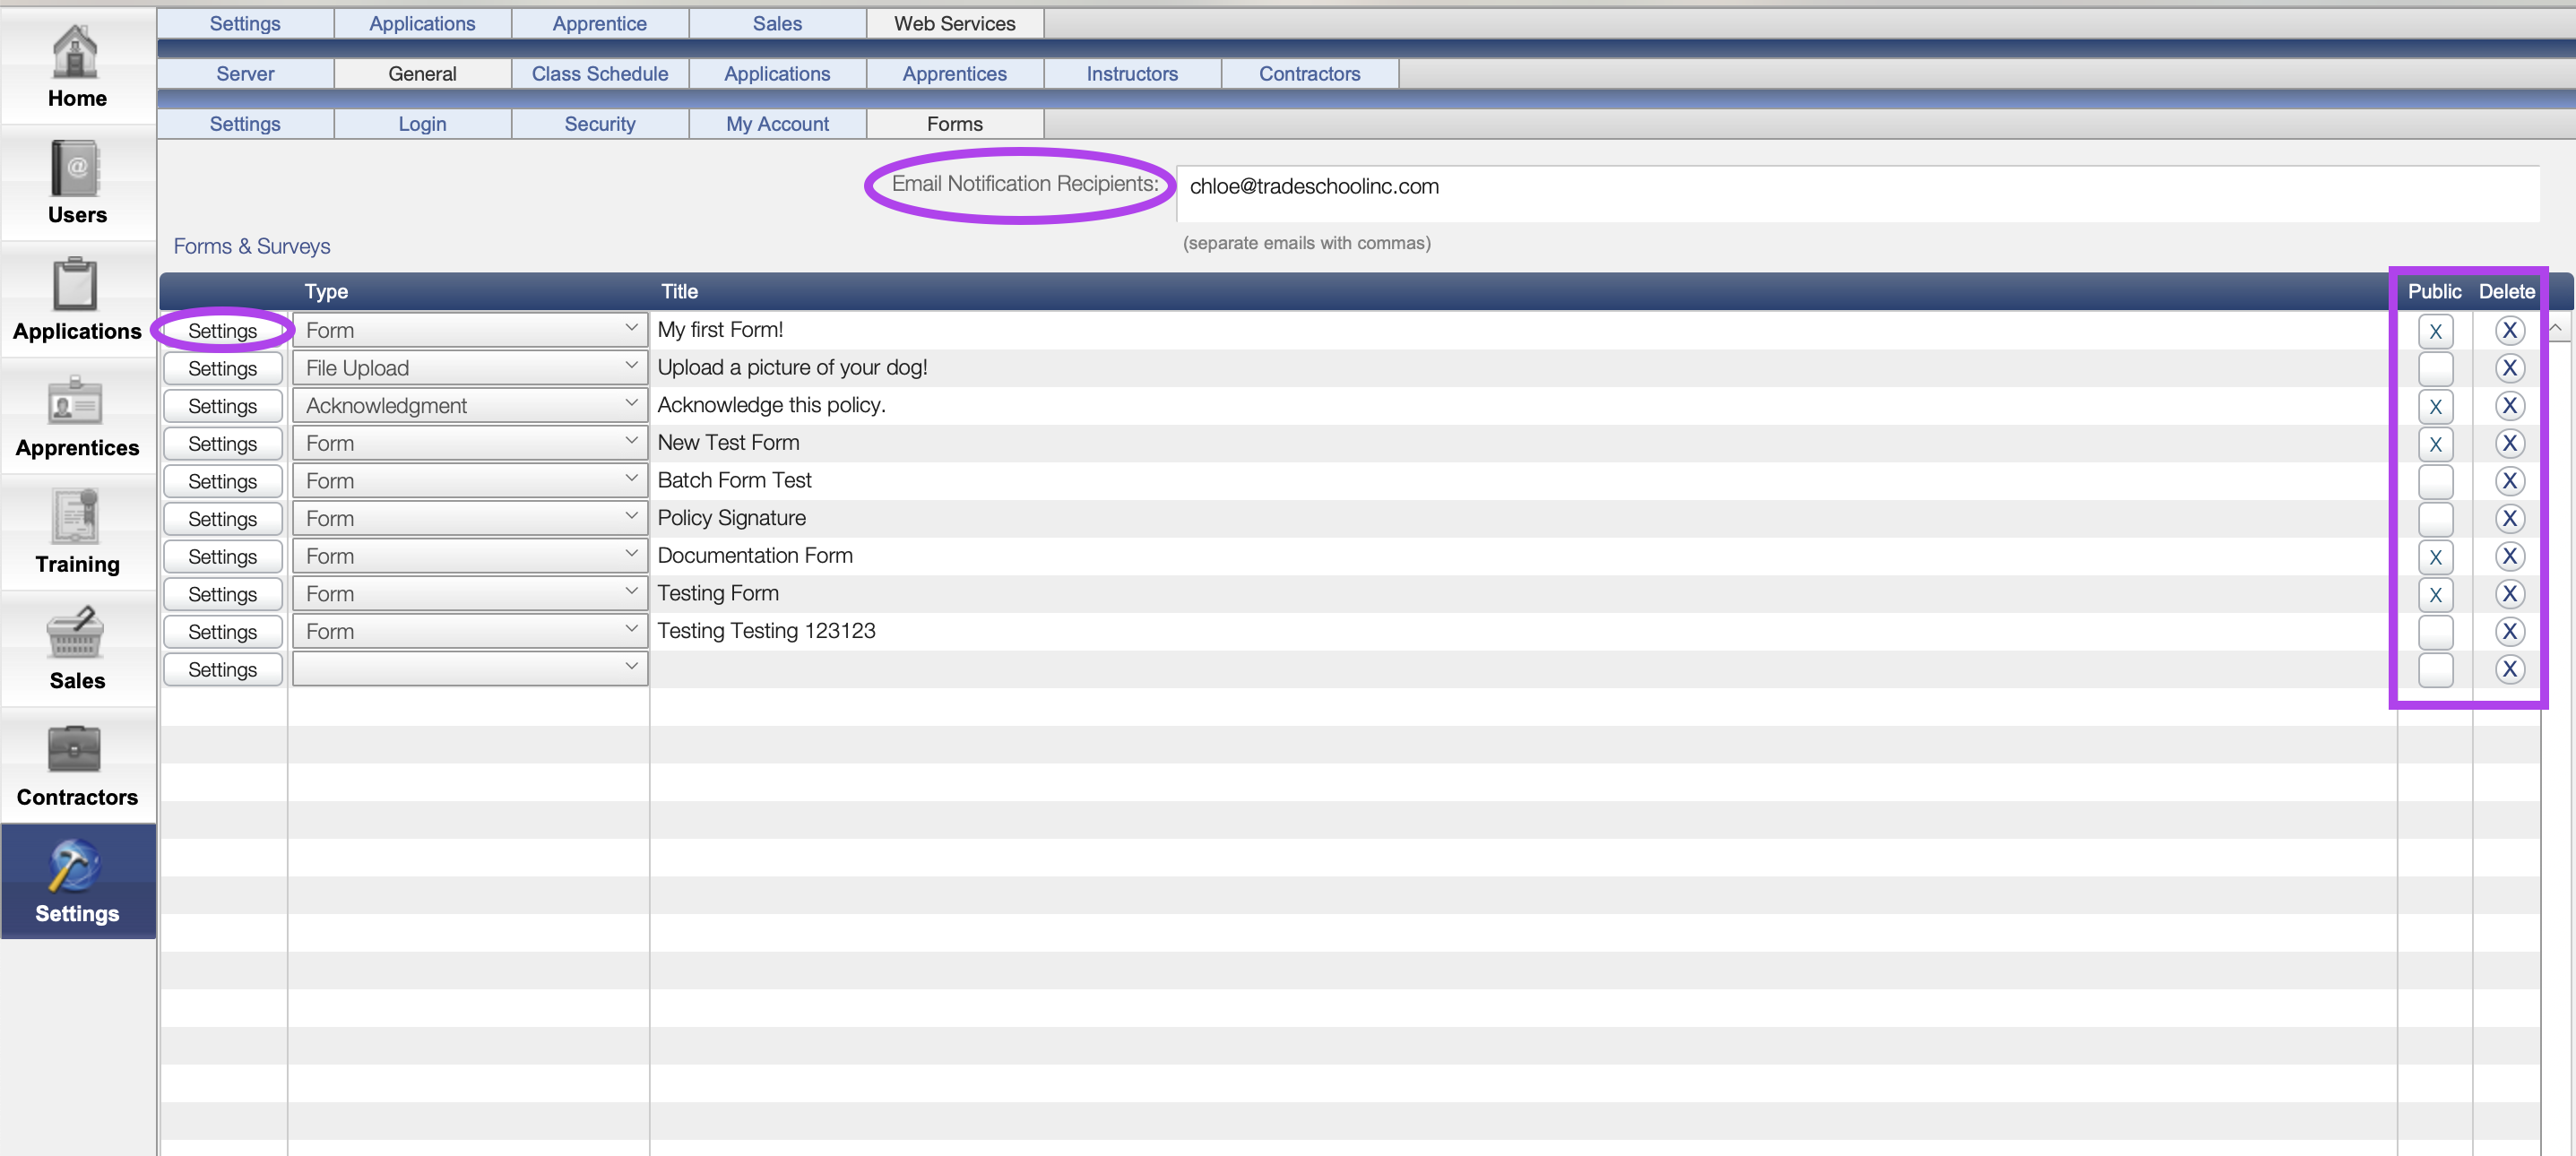
Configure Form Settings
-
Email Notification Recipients: Use the Email field to specify who in the office should receive a notification when a form is submitted.
-
Settings: Configure the layout of the form and its fields using the web step settings.
-
Title: Assign a clear, descriptive name to the form.
-
Public Checkbox: Allows apprentices to initiate the form themselves from their web account under My Account → Forms. Any form you want to make available for apprentices to initiate at any time should be marked as public.
-
Delete: Select the small X to delete the form entirely.
Requesting Form Completion from Apprentices
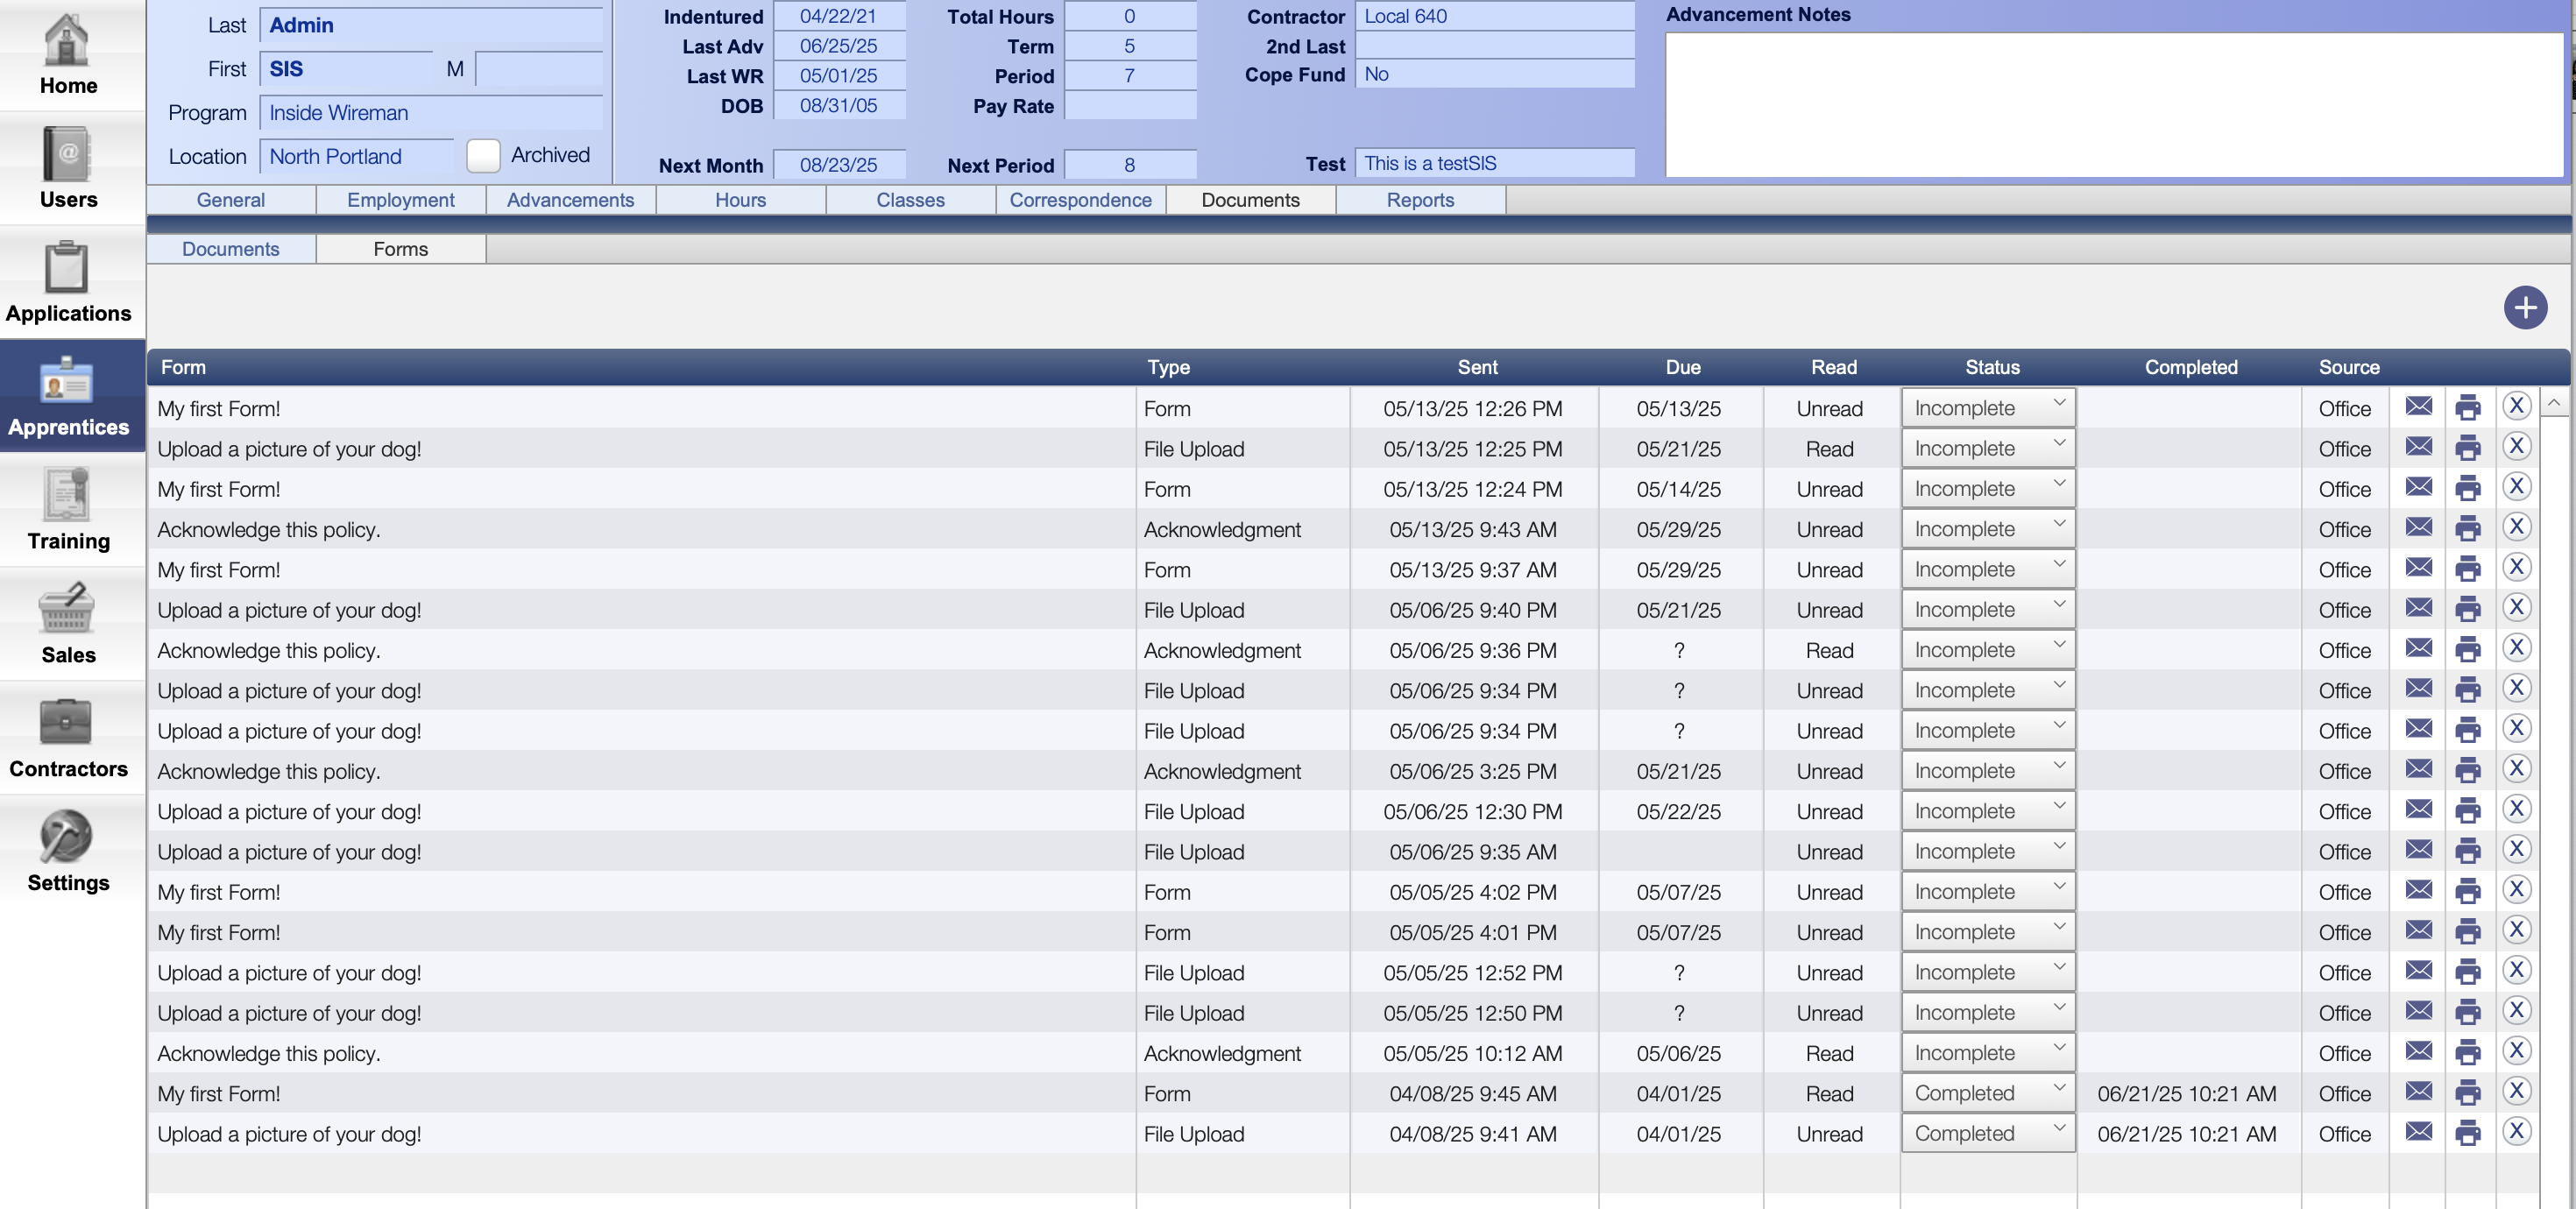
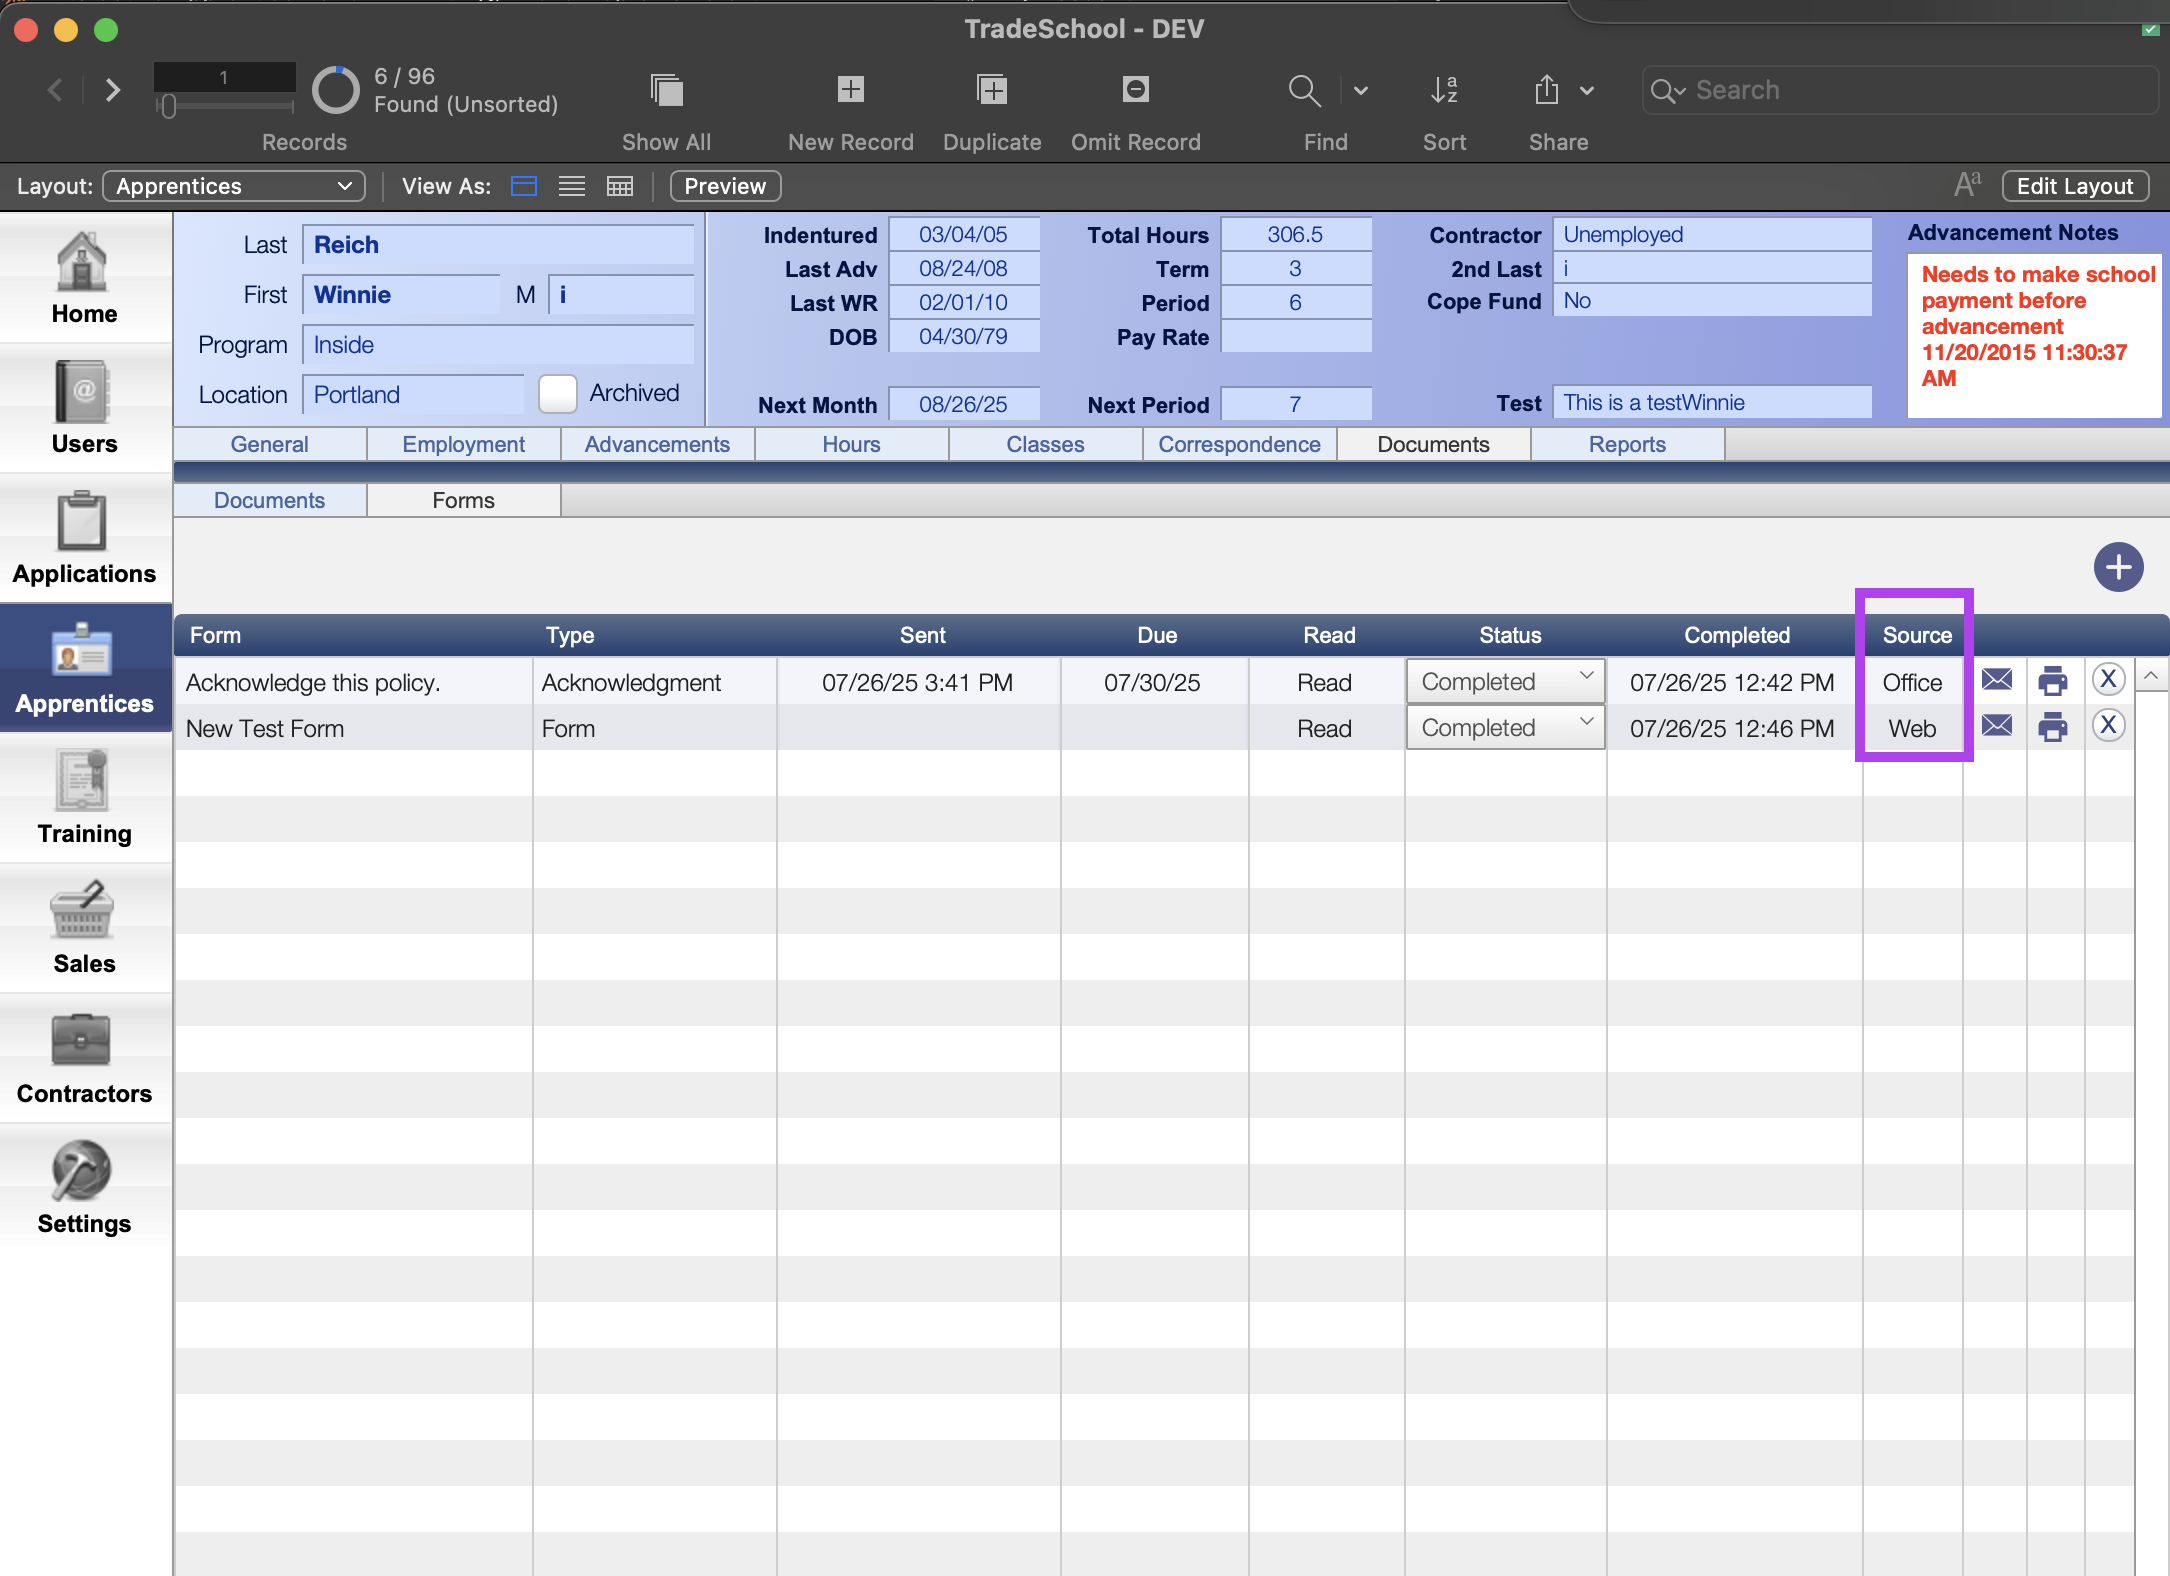
Access Forms in the Apprentice Records. Go to an apprentice’s record, then navigate to Documents> Forms tab.
Request a Form
Once you have your found set of apprentices, follow these steps:
- Click the ➕ button to assign a form.
- Select the form.
- Select a due date (required).
- Select an email template. A default message will be sent, but you can customize it if desired.
- The default email includes a link to the form and prompts apprentices to log in and complete it.
Tracking Status
After posting, you can view:
- Sent Date
- Due Date
- Read Status – Yes, you can see if it’s been opened!
- Completion Status – Incomplete, Pending, Complete
- Source – Will display Office if the office initiated the form, or Web if the apprentice initiated the form.
- Reminders – Click the 📧 (mail icon) to send a reminder to any apprentice who hasn’t yet submitted the form. This email will only be sent to individuals who still need to fill it out. Those who have already submitted the form will not be notified.
- Batch Sending - When you request forms for a batch, it will automatically not include people who don’t have a main email.
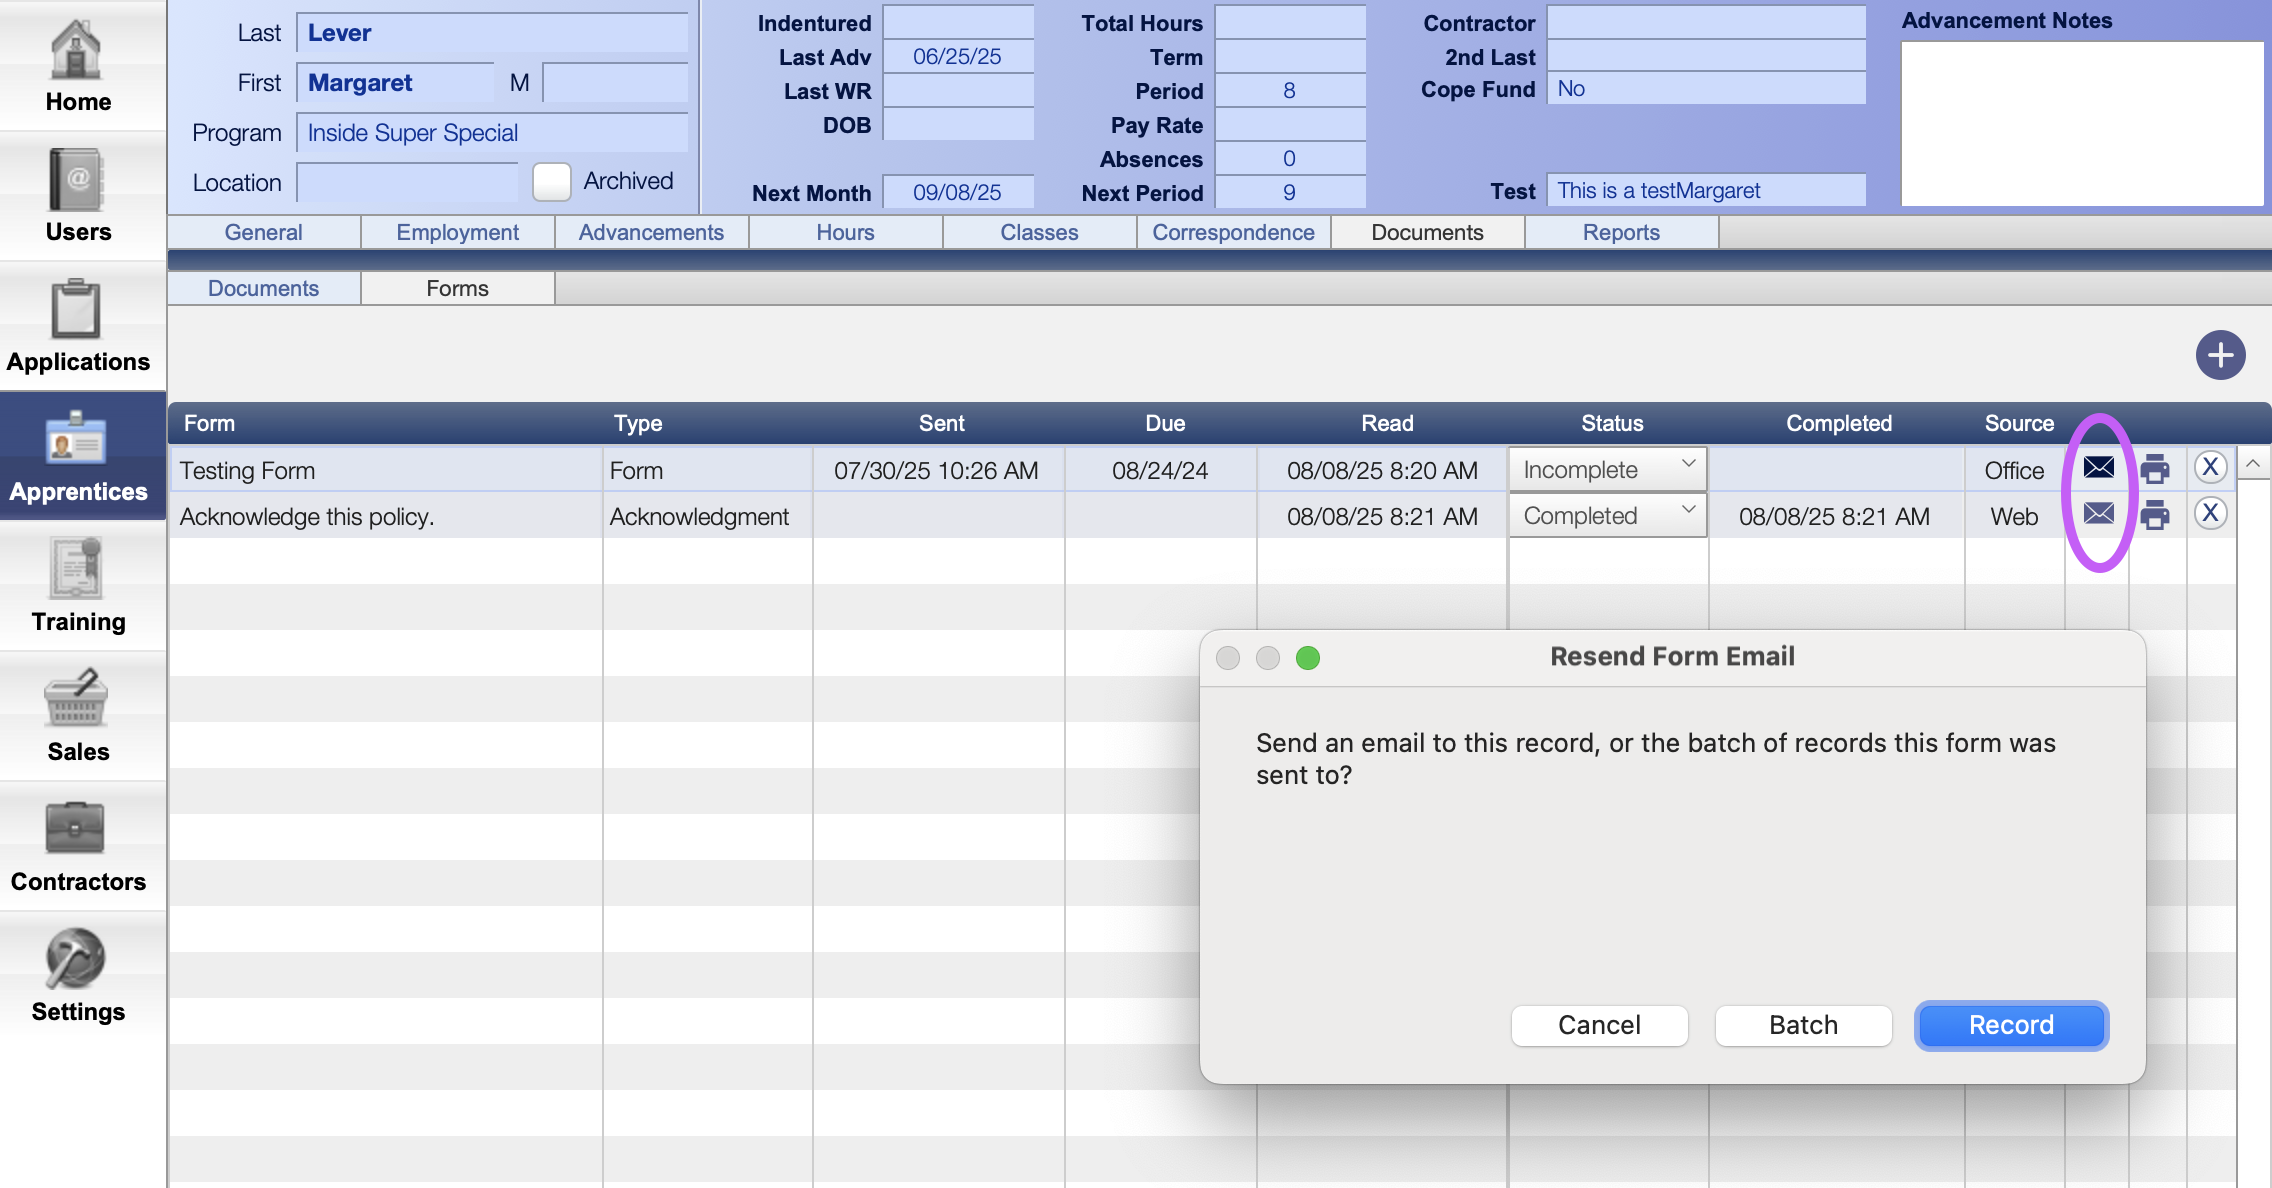
Source Label
Forms show a Source:
Office – requested by the office admin
Web – initiated by the apprentice on the web
Apprentice Experience
Apprentices log into their portal and go to My Account → Forms. A red notification will appear if a new form has been sent.
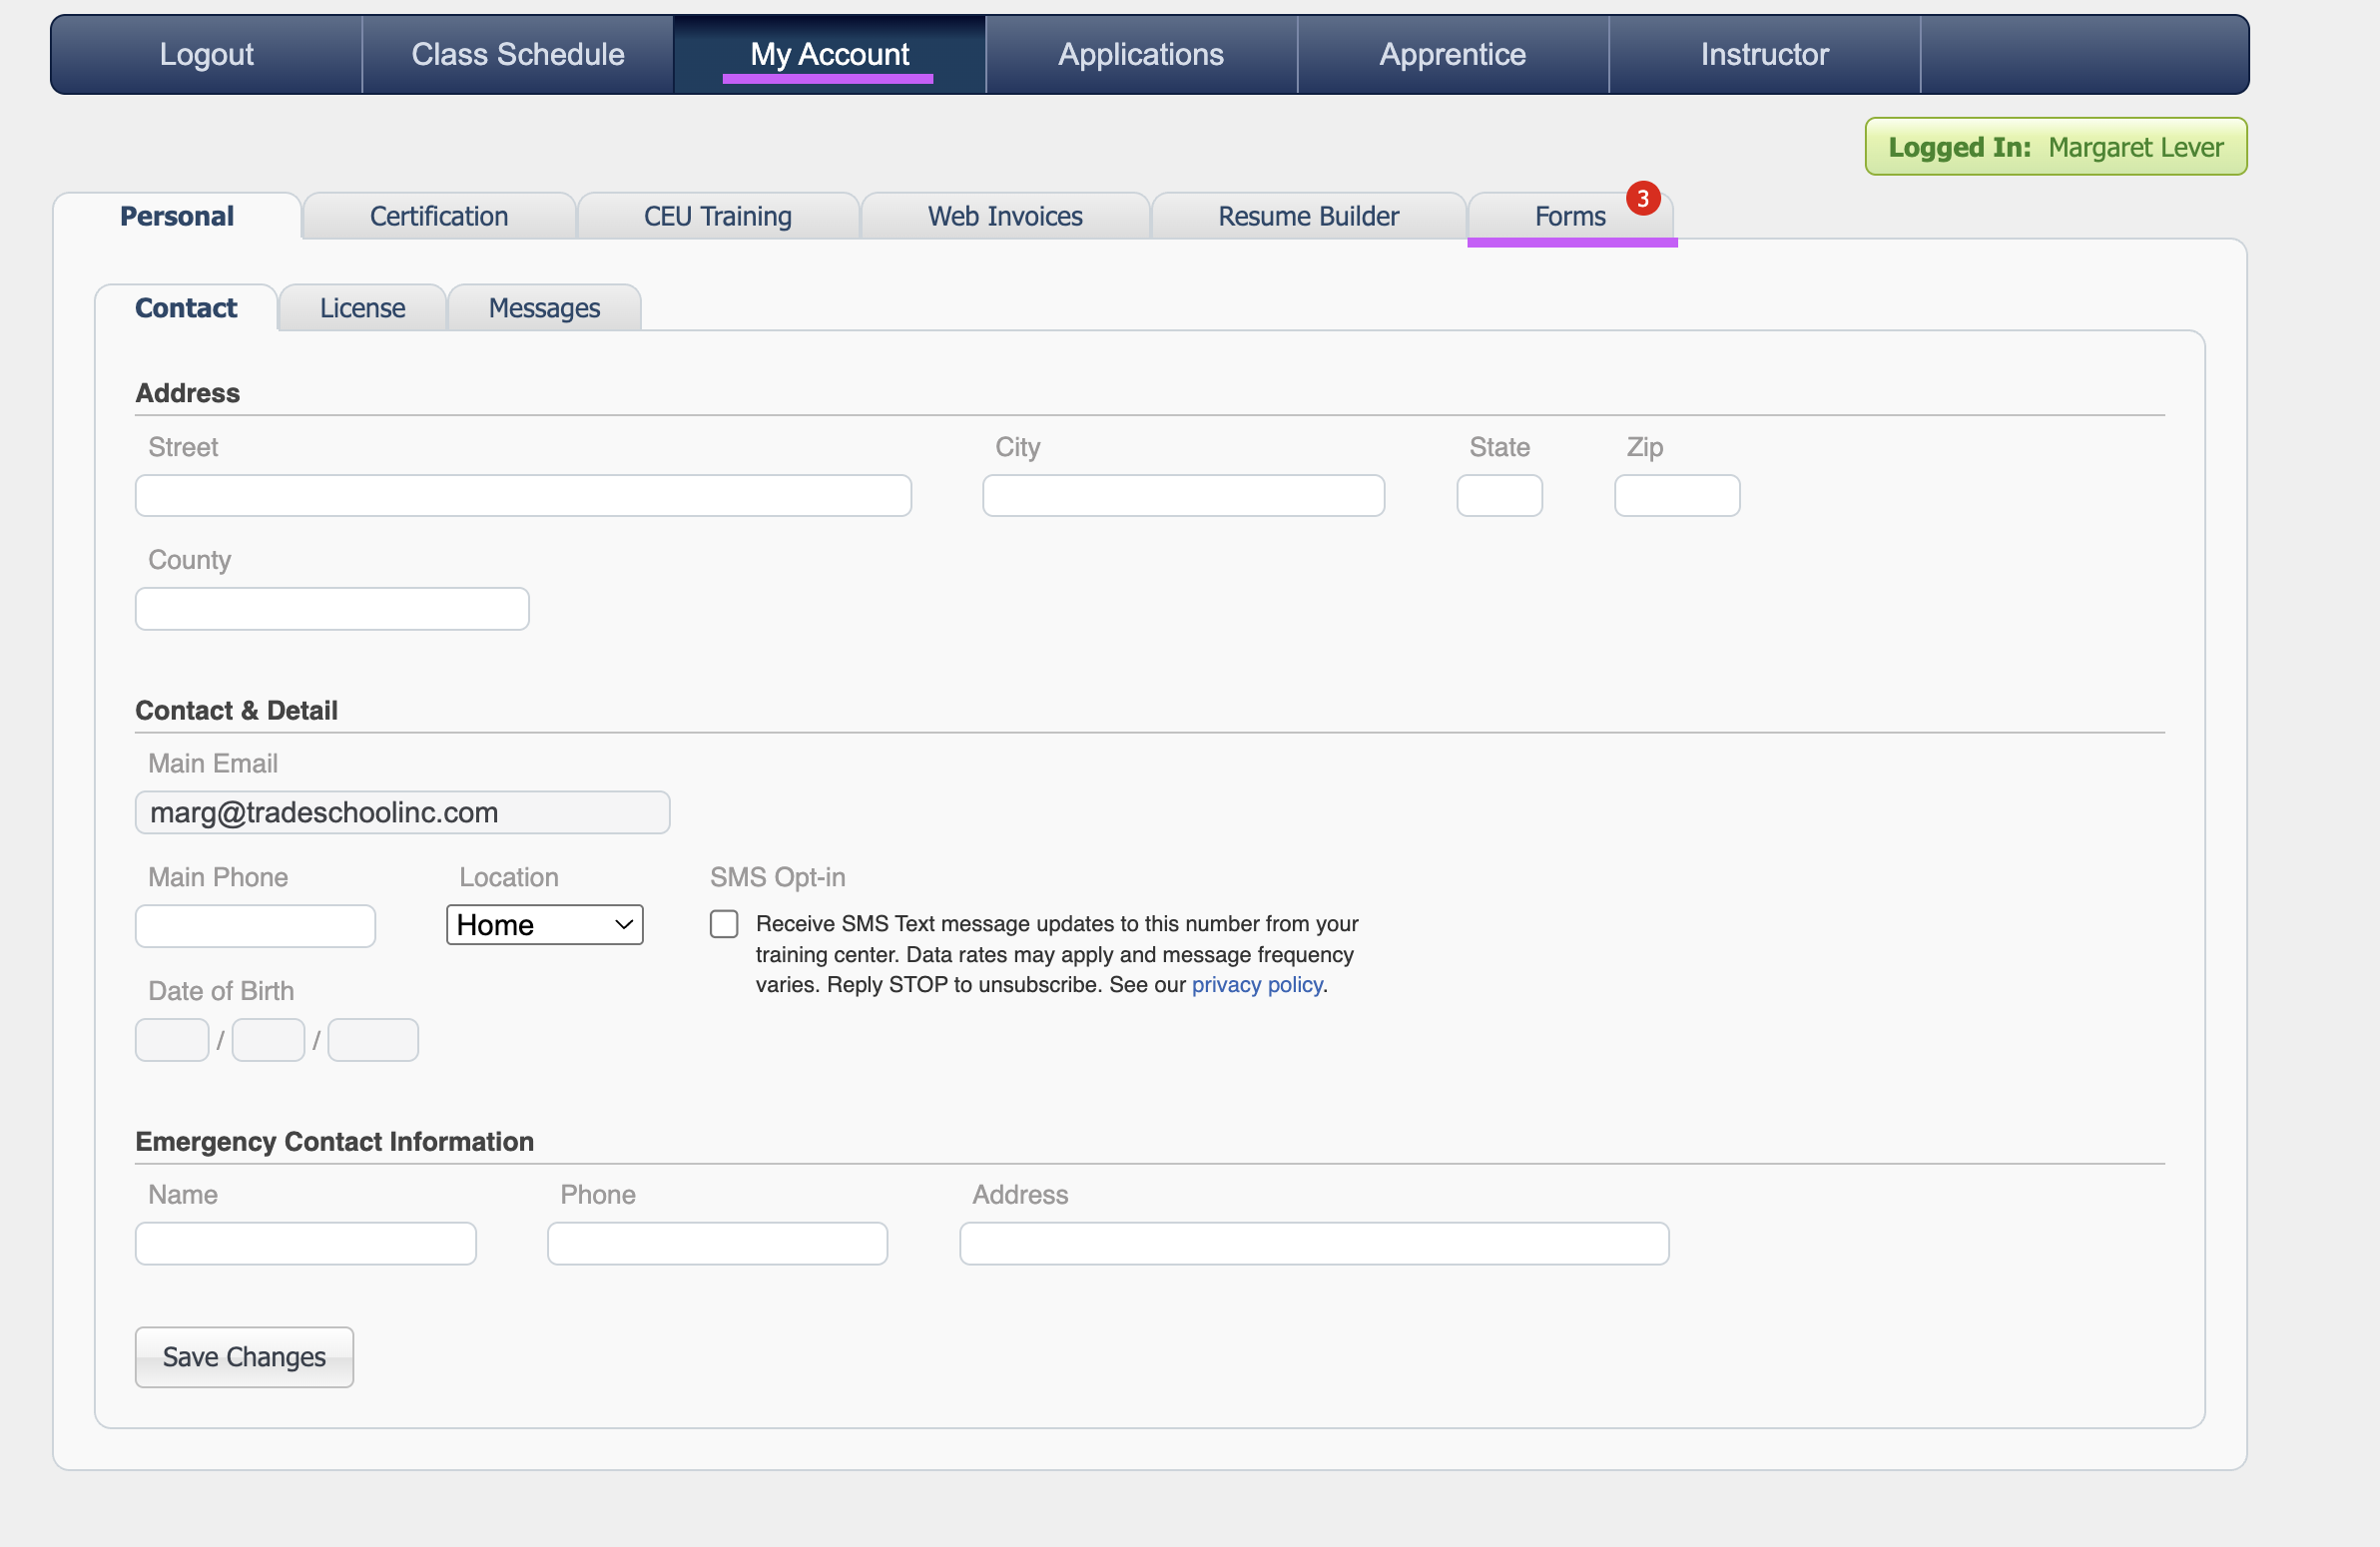
Forms are divided into two main categories:
-
Incomplete: Forms that have not been started and still need to be filled out.
-
Completed: A list of forms the apprentice has finished.
Submitting & Managing Forms
Apprentices can start, submit, or delete forms they initiate.
New Form
From the My Account → Forms tab:
- Initiate a form from the web by clicking the New Form button in the top-right corner.

- A drop-down list of forms the apprentice can revisit at any time will appear.
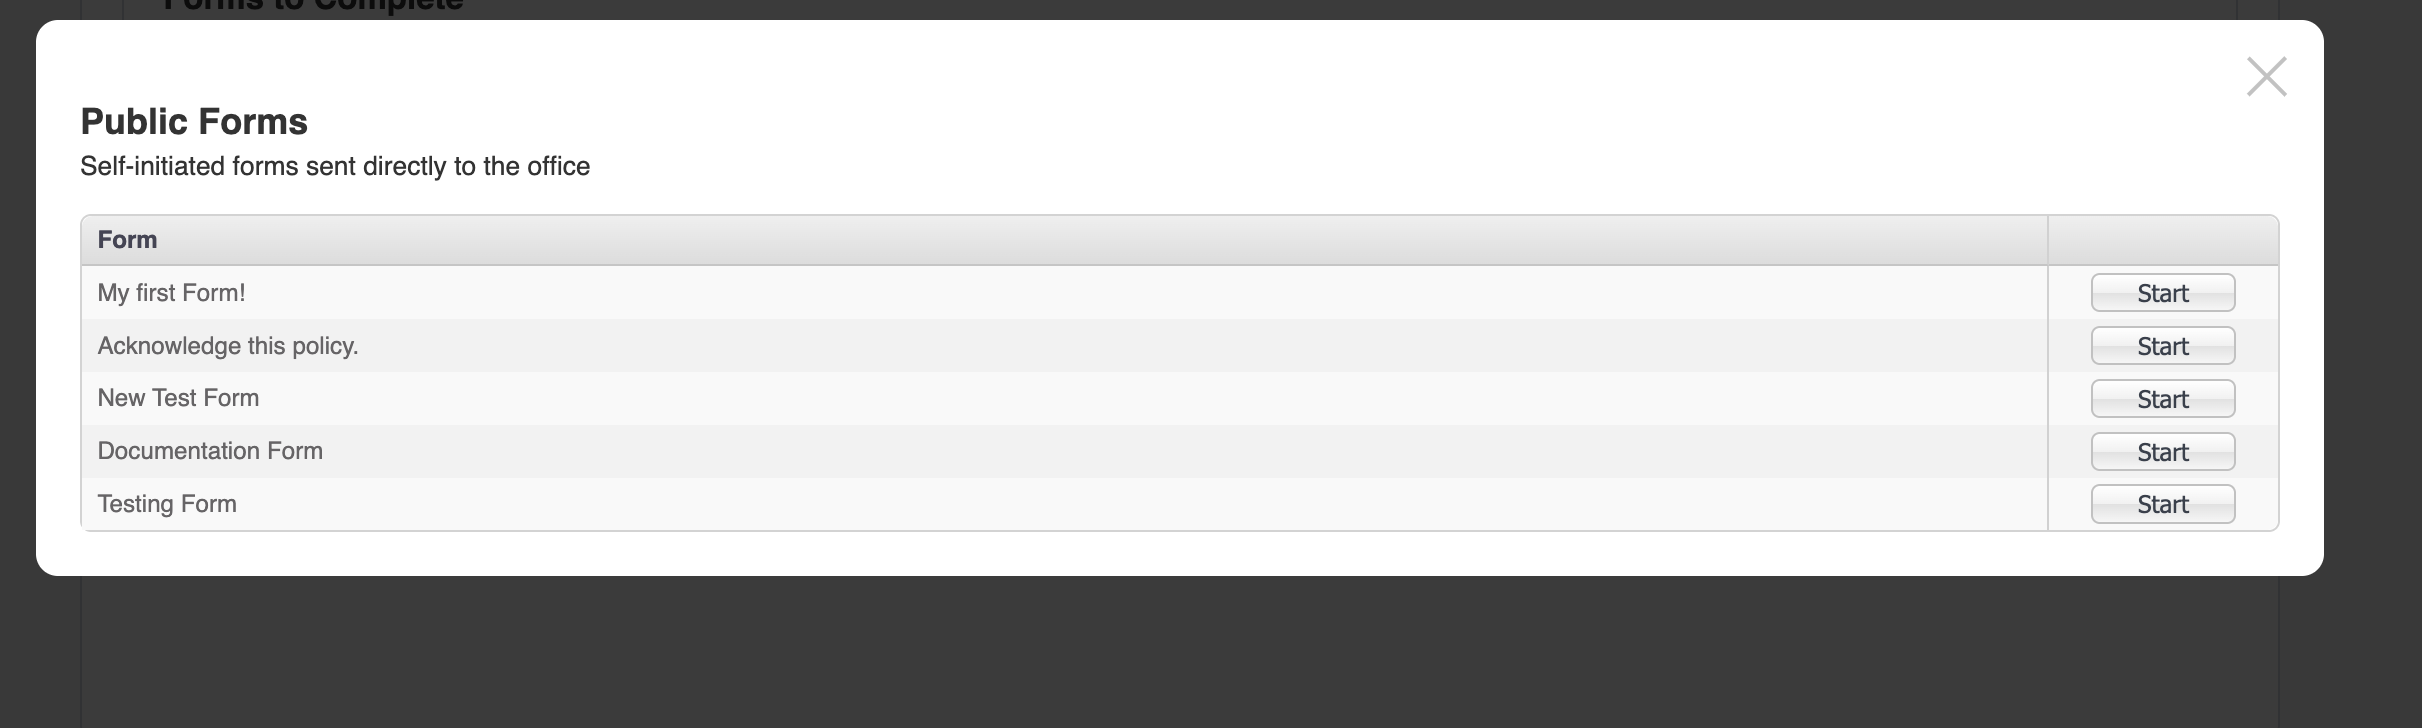
- Select the form to fill out. These Public Forms remain accessible to all apprentices in your program and can be completed at any time.
- Once submitted, The form is marked Complete.
- The form is added to the apprentice’s Documents section in TradeSchool on the admin side and appears in the Completed tab on the web for the apprentice to view.
- Email Attachments